
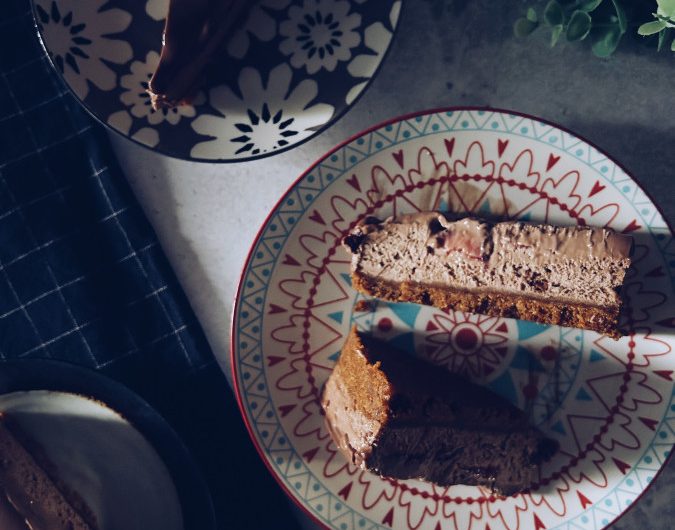
The Ovalmaltine Cheesecake recipe you didn’t know you needed. With just a handful of ingredients and a generous amount of time in the fridge, you can create the most indulgent, chocolatey cheesecake that’s sweet but not overwhelmingly so. Let’s dive into the process!
Ovalmaltine is not a household product in Singapore, I’ll say that for sure. I bought mine when I was walking around Candy Empire at Vivocity, and felt an urge to waste money. Yes, I said it. It’s one of those purchases that seems like a good idea at the time, but then just sits in the fridge after the first use.
Don’t get me wrong, I do like a chocolate spread and Ovaltine is still the malt drink of my dreams (after Milo lah). However, I do find it too sweet a spread on my bread. My tastes have gone from full-sugar Skippy to Sugar-free Adam’s Peanut Buttah, so you can see where I’m going with this.
But I digress. This recipe, while a product of a near-expiring Ovalmaltine spread and an insuppressible need for cheesecake, is simple and easy to make. Here’s why you need to make this, NOW:
- This is an eggless recipe
- It’s a chilled cheesecake, no complicated baking (with water baths) involved
- No gelatin is needed to help the cheesecake set
- It’s not cloyingly sweet or too rich
- Can be made in the morning, and eaten at night
The cheesecake base

I have used Lotus Biscoff Biscuits for this base. Here’s why:
- It’s conveniently packaged in a 250g pack
- It tastes fantastic with cream cheese
- It crushes to a fine sandy texture rather easily
If you do not like this biscuit, feel free to use Marie biscuits or plain digestive biscuits. The portion of butter needed to make the base will remain at 100g. However, if you’d like a more buttery base, use more! You will get a rather stiff base later on after chilling though – best to bear that in mind.
Ready to go? Here’re some snapshots of the recipe


Is Ovalmaltine not your thing? Here’s a Nutella Cheesecake Recipe.
Ovalmaltine Cheesecake
Course: DessertCuisine: WesternDifficulty: Easy12
servings30
minutesDiscover the must-try Ovalmaltine Cheesecake recipe. With just a few ingredients and some chill time, you can craft a delightful, balanced indulgence. Let’s get started!
You’ll need;
- For the base
250g Lotus Biscoff Biscuits
100g unsalted butter, melted
- For the cake
217g Philadelphia cream cheese, at room temperature
150g Ovalmaltine spread, at room temperature
250g full-fat whipping cream
- For the topping
120g strawberries, hulled and thinly sliced
70g milk chocolate buttons
100g fresh cream
You’ll need to;
- Prepare the pan
- Get an 8-inch pan with a removable base. I lined the sides of the pan with a plastic strip so that the cake doesn’t stick. If you’re using a spring-form, then flip the base, so that there isn’t a ridge along the base of the pan. See notes for alternatives. Once done, set the pan aside.
- Start with the base
- Crush the biscuits in a food processor or in a ziplock bag (bang it repeatedly with a rolling pin – this is very therapeutic). Mix in the melted butter until the crumbs look like wet sand. Press this mixture into the base of the pan. Make sure to get the biscuit mixture properly pressed along the edges – I find the back of a spoon to help me well here. Place it in a cool place, you don’t have to put this in the fridge as yet.
- Get the filling started
- In the bowl of an electric mixer, whip the cream till it forms soft peaks. It doesn’t have to be whipped stiff. While the mixer is running, combine the cream cheese and ovalmaltine spread in another large bowl. Mix them together until they form one homogeneous paste.
- Add the softly whipped cream to this mixture, and fold in patiently. It will take up to 5 minutes to get everything combined together beautifully.
- Pour this mixture onto the waiting base. Using an offset spatula, spread out the mixture. Place the cheesecake in the fridge for up to 4 hours, so it’s completely set.
- Do the topping
- In a microwaveable bowl, combine the milk chocolate and the cream. Microwave on high at 15-second intervals, stirring between each interval to ensure that the chocolate is melting well. When you hit the point where there are only a few lumps left, keep stirring somewhat vigorously until the remaining chocolate melts. (see notes for alternatives) Set this ganache aside.
- Place the sliced strawberries on the cake in any way or form you prefer. Don’t have to be too pretty about this, as this will be covered by the milk chocolate ganache anyway.
- Once you’re happy with the arrangement of sliced strawberries, pour the waiting ganache all over this mixture. Use an offset spatula to coax the chocolate into the crevices, right up to the edges.
- Transfer the cake to the fridge once again to set it completely. Serve for dessert.
Notes
- The milk chocolate ganache will never be set completely – it’s a soft set so that it’ll be easier to slice through.
- Don’t like strawberries? Use any other berry you like!
- If you’re not using plastic strips, line the sides with baking parchment. You’ll have to cut the parchment to fit the sides though. However, this is an important step and should not be skipped. You’ll thank me later when you peel off the strip to reveal a beautifully intact cheesecake.
- If your cheesecake is sticking to the side, it may not be fully set. Fret not, use a knife to slowly run around the edge of the plastic or baking parchment cuff along the perimeter of the pan AS you peel it back.
- If you don’t use a microwave, then here’s what you can do: place the chocolate in a heatproof bowl. Then, heat up the cream until it reaches a simmer point (DO NOT boil it). Pour this hot cream over the chocolate, cover and leave undisturbed for 5 minutes. Then, using a spatula, stir the mixture evenly until the chocolate melts.