
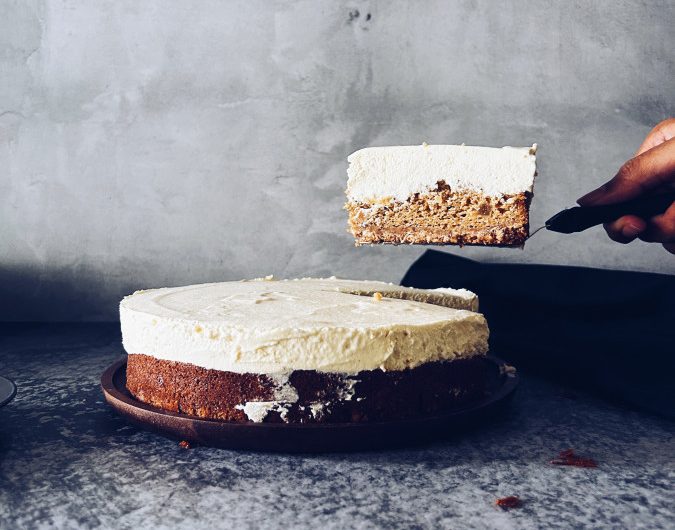
Think carrot cake sandwiched between a layer of cheesecake and a biscuit crumb. That’s what this Carrot Cheesecake is, essentially.
Carrot Cheesecake is not to be taken lightly, although this is a super light, airy, moist and delicious cake! There are a few steps to observe, and yes you have to grate a carrot but trust me; once you’ve had this, you’ll never be able to have carrot cake the same way again.
Are you after a no-fuss carrot cake? Here’s a recipe you’ll love.

Here’s why this cake is a dream to make (and eat)
- Remains moist for days, thanks to the secret moist-makers
- Layers of flavour and texture
- It’s not all sweet, there’s a fair amount of ginger and spices in there
- It comes together very easily, and very fast
Here are the key ingredients for Carrot Cheesecake

Carrot – this is a no-brainer. 150g of shredded carrot, but I will let you in on a secret; I don’t weigh after grating. And I don’t like sticking to the stipulated weight of grated carrots. Essentially if you’ve got about 200g of whole carrot, I’d say that’s a good amount to start with. You’re going to cut off the ends, peel and grate it. You’ll lose some this way, trust me. Plus, a bit more carrot can do wonders for the cake’s texture.
Apple sauce – I cannot tell you how crucial this is in this recipe. Apple sauce elevates the cake texture to the next level, making it pillow-soft and squidgy even when it’s left in the fridge. I also go for a chunky apple sauce that’s very mildly sweet, because this means that it stays chunky and adds texture to the finished cake without making it too sweet.
Cream cheese – and a lot of it. The cheesecake layer of this recipe doesn’t use gelatin to set. Rather; it uses the natural tendency of cream cheese to firm up in the fridge. So, you’ll need at least 2 blocks of cream cheese. This layer is also not too sweet, especially due to the whipped cream.
Biscuit – I used digestive biscuits, McVities to be specific. You can use whatever digestives suit your fancy. The nuts in this layer are crucial because the biscuits tend to soften in the fridge. The nuts help to make this biscuit layer crunchy.
Oil + Butter – this cake uses both oil and butter. Oil keeps the cake from going rock hard in the fridge, so you’ll be assured a delicious cake each time. Butter adds richness to the cake, which we love.
The biscuit layer

I used nuts, digestives and butter to bring this base together. You can use any crackers, cookies and biscuits you would prefer.
The carrot cake layer
This layer uses oil, butter, apple sauce and other ingredients to ensure moisture. As the cheesecake layer needs to set in the fridge, it’s very important to make a moist cake.
The cheesecake layer
When making this, I realised that our Asian room temperature does not allow the cheesecake mixture to firm up. It was pretty ‘pourable’ as opposed to ‘spreadable’. To circumvent this, I left the finished cheesecake layer in the fridge for about 30 minutes to firm up. It became much easier to spread after this.
Cooling and cutting
Once the carrot cake is baked and out of the oven, you’ll find that it has domed a bit. This is fine, it happens. When making this cake, I used a serrated knife to cut off the domed top. This left a dishevelled-looking cake interior, which I covered with the cream cheese layer. It’s important to work on the carrot cake only after it’s cold, so plan your time accordingly.
Making the Carrot Cheesecake
I would recommend making the biscuit base and cake layer in the morning, and then preparing the cheesecake layer while the completed cake is cooling. Cold cream cheese and whipped cream on a hot or even warm cake is not a disaster we want in our kitchen.
Let’s get started.
Carrot Cheesecake: The next-level carrot cake
Course: DessertCuisine: AmericanDifficulty: Easy12
servings1
hour40
minutes300
kcalWant the best of both worlds? Try this: Cheesecake top, carrot cake in the middle and a nutty, buttery biscuit base to boot. A combination that is irresistible and easy to make.
You’ll need;
- For the base
120g digestive biscuits
60g almonds, whole (or chopped if you have that)
2 tbsp dark brown sugar
75g butter, melted
- For the carrot cake layer
85g unsalted butter, melted
130g shredded carrot
65g applesauce (see notes)
60ml olive oil
135ml buttermilk
100g fine white sugar
80g dark brown sugar
2 large eggs
215g plain flour
1 tsp baking powder
¼ tsp baking soda
1 tsp ground cinnamon
½ tsp ground ginger
- For the cheesecake layer
434g cream cheese (I used 2 blocks of cream cheese), at room temperature
80g powdered sugar
1 tsp vanilla extract
315ml whipping cream, cold
You’ll need to;
- Start with the base
- Place the digestive biscuits into the bowl of a food processor, and blend until you get a fine crumbly mix. Remove and set aside. In the same processor, add the whole almonds and process until the nuts are finely chopped (skip this step if you’re using pre-chopped nuts).
- Mix the biscuit crumbs, nuts, sugar and melted butter to form a wet sand mixture. Press this into the bottom of a 9-inch springform pan. Set this aside.
- Make the carrot cake
- Place the melted butter, carrots, applesauce, oil, buttermilk, sugars, eggs and vanilla in a medium bowl, and whisk to mix well.
- In a large bowl, sift the flour, baking soda, baking powder and spices together. Add the wet ingredients into the dry, and whisk until just combined (about 15 seconds, max.). Pour out the batter onto the digestive biscuit base and bake for 30 minutes. Test the cake for doneness with a wooden skewer, and set aside to cool.
- Make the cheesecake
- In the bowl of a stand mixer, place the cream cheese and icing sugar. Beat with the whisk or paddle attachment until well combined and smooth. This usually takes about 2 minutes.
- Then, add the vanilla extract and cold heavy cream. Beat on high until the mixture is smooth and fluffy. Due to our rather warm temperature, the mixture will not be able to hold its shape as yet. While beating the cream into the cheese mixture, you’ll have to scrape down the sides of the bowl at least 3 times. This is to make sure everything is mixed into one homogenous, pale mixture.
- Once you’ve seen that the cream has been whipped into the cheese, remove the bowl from the mixer and move it to the fridge to firm up, for about 30 minutes (at least).
- Assemble the cake
- Release the cake from the springform pan by undoing the sides. Using a serrated knife, slice the top of the domed cake (if yours has domed) to make it flat. Don’t be too fussed about this – it’s okay if it’s not perfectly flat. Just slice off the dome.
- Once you’ve done that, put the ring of the cake tin back on. You’ll be spreading the cheesecake on top of this, so the sides need to be back on to keep the cheesecake from spilling over. You can use a cake collar at this point if you have that.
Notes
- Don’t skip the applesauce – it adds moisture to the finished cake. If you can’t find this, you can substitute it with mayonnaise if you’re in a pinch.